
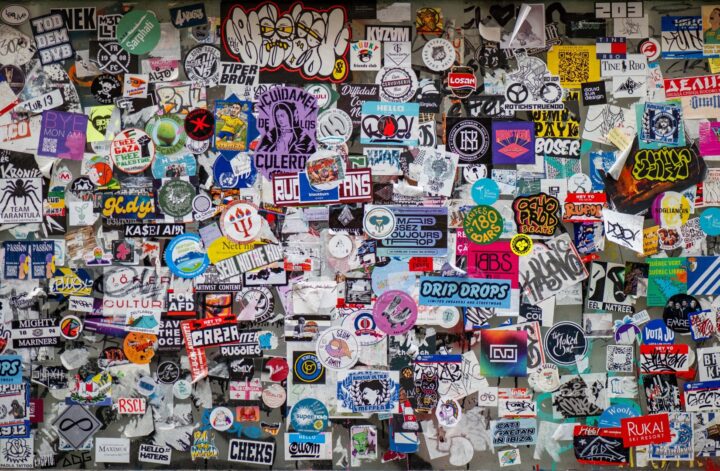
A sticker collection can get out of hand fast. That is part of the charm, but it is also how people end up with stacks of stuff they do not actually care about. If you want to start a sticker collection that feels personal and worth keeping, the goal is not to buy the biggest pile possible. The goal is to build a group of pieces you will still want around later.
That usually means slowing down a little at the start. Not a lot. Nobody is asking you to turn sticker collecting into a solemn academic ritual. But it helps to know what you are collecting and why. Artists, street pieces, shop exclusives, event packs, monochrome work, character art, typography-heavy designs, local creators, mail trades, old skate graphics, weird little things found in the right place at the right time. Any of those can be the start of a real sticker collection.
Start With Taste, Not Volume
The fastest way to ruin a new sticker collection is to buy bulk junk just because it is cheap. Those giant mixed packs look tempting until you realize half the designs are filler, the print quality is uneven, and none of it really means anything to you. Then it becomes clutter with adhesive.
A better way is to buy slowly and follow your taste. Start with five stickers you actually like. Then ten. Then maybe a pack from an artist whose work you keep coming back to. Collections get stronger when they grow from attention, not impulse.
This also makes your collection easier to remember. You know where pieces came from. You know which artists matter to you. You remember the order, the trip, the trade, the show, or the exact moment you found something great. That memory layer is part of what makes collecting satisfying.
Buy From Artists, Small Shops, and Real Scenes
A good sticker collection usually reflects where you were looking. If you buy mostly from independent artists, small sticker shops, zine fairs, print events, music tables, and real creator-run sites, the collection will feel more alive. You get more variety, more point of view, and usually better stories behind the pieces.
That matters because sticker culture has always had a community side. Stickers move through mail, hand trades, exhibitions, archived street graphics, artist packs, and shop drops. They are not only products. They are also traces of scenes, subcultures, and individual styles.
And honestly, artist-made work tends to age better. You may outgrow trend stickers fast. You usually do not outgrow good design as quickly.
Decide Early Whether You Are Using Them or Saving Them
This is the first collector fork in the road. Are you building a sticker collection to use, or are you building one to preserve?
Most people land somewhere in the middle. They stick some and save some. That is usually the best answer. It lets the collection stay alive while still protecting the pieces that feel rare, signed, old, hard to replace, or just too good to burn on the side of a laptop that is already on borrowed time.
If you know you like to preserve things, set up a storage system early. You do not need a museum vault. But you do need something better than a random drawer where edges curl and paper backs warp.
Use a Simple Storage System That You Will Actually Maintain
The best storage system is the one you will keep using.
For a casual sticker collection, clear sleeves, binders, pocket pages, small archival envelopes, and labeled boxes work well. If you are collecting rarer paper pieces, older ephemera, or stickers you really want to preserve, acid-free and archival-quality storage materials are a smart move. That sounds fancy, but the idea is simple. Better storage lowers the chances of bending, moisture damage, transfer, and long-term paper issues.
You also do not need one system for everything. Use a binder for active browsing. Use envelopes or archival boxes for your best pieces. Use a smaller trade stack for duplicates or things you are willing to swap. That keeps the good stuff safer and the usable stuff accessible.
And label your sections. Future you will appreciate it. Current you will pretend this advice is unnecessary, then spend twenty minutes looking for one sticker later.
Keep Some Record of What Matters
A sticker collection gets more interesting when you remember where things came from.
You do not need a giant spreadsheet unless that is your thing. A note in your phone, a card tucked into a sleeve, or a small label system can be enough. Artist name, where you got it, year, event, city, trade, edition note, or why it mattered. Tiny details become useful later.
This is especially true if you get into artist packs, street graphics, zines, or trade culture. Context disappears fast. The sticker remains, but the story behind it can vanish if you do not write anything down.
That is part of why archives matter in sticker culture. So much of this world is temporary by nature. The rain gets it, the wall gets painted, the event ends, the shop closes, the link dies. Keeping a little context with your own collection is not overkill. It is just smart.
Use the Collection, Too
A sticker collection should not become a guilt pile.
Use some of the stickers. Put them on things you care about. Trade duplicates. Give a few away. Rotate display pieces. Keep a couple in your sketchbook or notebook. Let the collection live a little. If you preserve everything, you may end up with a perfect archive and zero fun.
There is no single correct balance here. Some collectors are strict. Some are chaos merchants with one surviving envelope and three decades of great stories. Most people land somewhere between. That is fine.
What matters is that your sticker collection feels like yours. Not a random algorithm. Not a bargain bin. Not an accidental landfill starter kit. Yours.
Build a Collection You Can Still Respect Later
That is the real goal.
A sticker collection does not need to be huge to be good. It just needs shape. Taste. A little memory. A little discipline. A little room to get weird. Start small, buy with intention, store the best pieces properly, and support artists whose work you actually want around.
If you do that, the collection gets better with time. And that is a lot more satisfying than owning five hundred stickers you do not even remember buying.