Printed Sticker Backs for Artists: Branding Without Distracting From the Front
TLDR: Printed sticker backs for artists work best when the removable liner adds a small reward: a visual echo, hidden image, compact release note, mini-print, or restrained signature. Use a separate backing card when you need more room or want the extra art to remain intact. Use a kiss-cut sheet when the surrounding carrier area is part of the composition. Before designing anything, confirm that the printer supports liner backprinting rather than assuming “double-sided” means the same thing.
The front of a sticker has the obvious job. It must read at a glance, hold together at a small scale, and feel worth peeling or preserving. The paper underneath is usually treated as disposable, but it can also function as a temporary second surface. The trick is making that surface feel like part of the artwork rather than the back of a cereal box.
What is a printed sticker back?
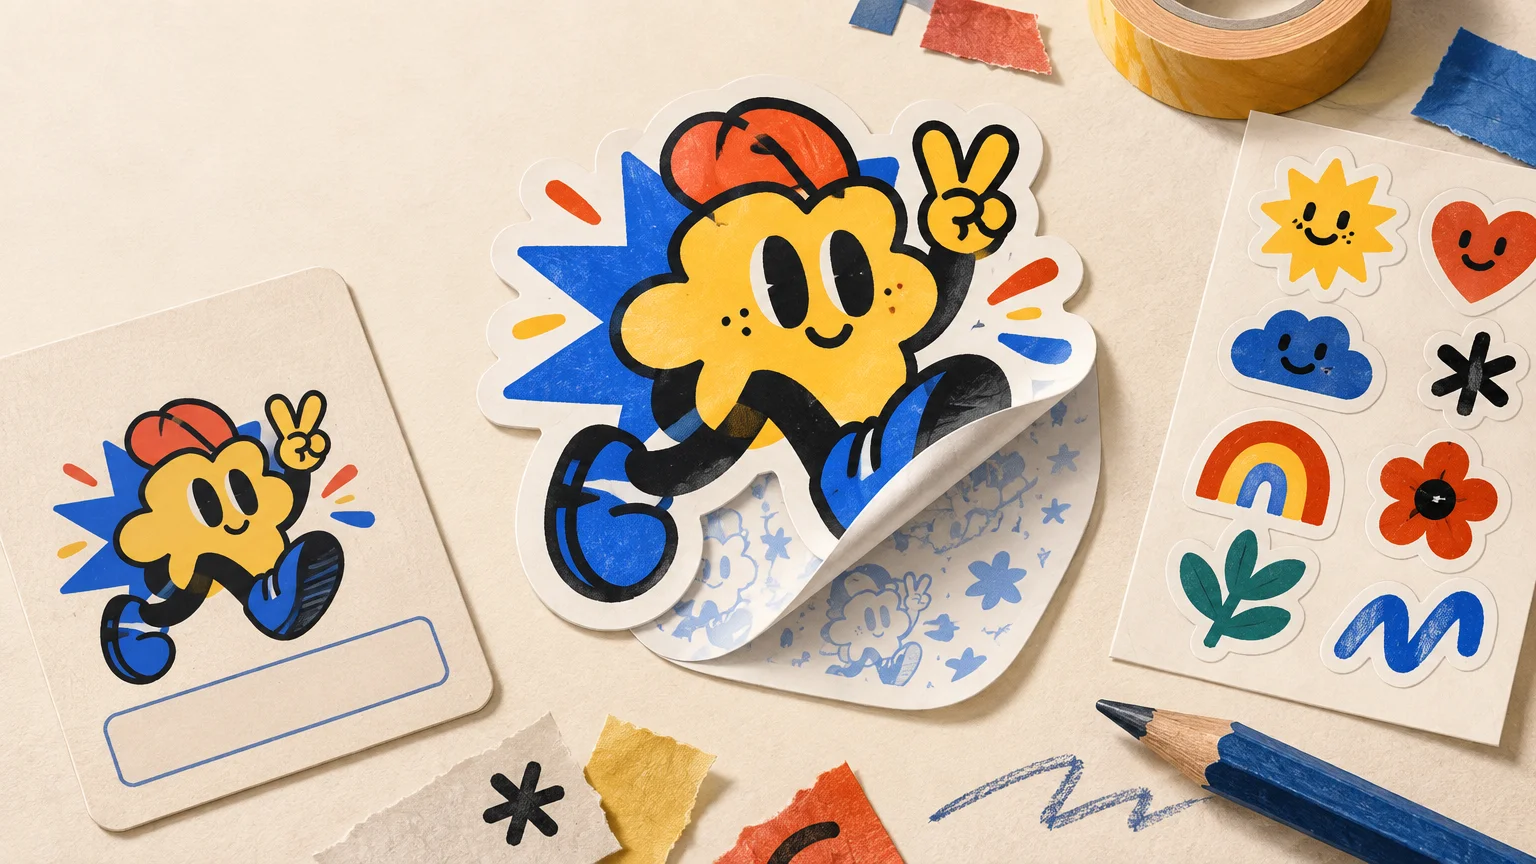
In this context, a printed sticker back is artwork printed on the removable release liner—the coated paper from which the adhesive sticker peels. Some printers call the product a backprinted sticker or describe the option as liner printing. The wording is not perfectly consistent, so artists should identify the physical surface rather than rely on a product name.
This is different from printing on the adhesive side of the sticker itself. It is also different from attaching a sticker to a separate illustrated card. Once the sticker is peeled, the printed liner remains as a small paper object while the rear of the sticker remains adhesive.
The distinction matters because “sticker back” can refer to at least three visual formats: a printed release liner, a backing card, or the carrier area surrounding kiss-cut stickers on a sheet. Each offers a different amount of space and survives use differently.
When printed sticker backs for artists earn their space
A printed liner is most convincing when the second surface changes how someone encounters the piece. It can establish a short sequence: see the front, turn it over, peel it, then discover what remains. That sequence suits artist-made stickers because the object can feel considered from both directions without requiring elaborate packaging.
It is less useful when the back contains only oversized branding, repeated contact details, or a dense block of promotional copy. The sticker face should remain the main event. If the liner competes for attention, simplify it until the front and back have a clear hierarchy.
For a pack, liner art can also provide a shared visual thread. Several unrelated front designs might use the same rear pattern, type treatment, or mark to identify them as one release. That can strengthen the kind of cohesion discussed in this guide to what makes a vinyl sticker pack feel curated without forcing every sticker face into the same palette or composition.
Five creative approaches to liner art
1. The visual echo
Repeat one element from the front at lower intensity: a cropped line drawing, background texture, tiny character silhouette, or single color. An echo connects the surfaces while preserving the front as the more complete image. It is especially useful when the face is already busy.
2. The peel reveal
Design the liner so peeling the sticker exposes a second image or punch line. The reveal should still make sense if registration shifts slightly or the viewer peels from an unexpected edge. A reveal that depends on two tiny features aligning perfectly may be clever on screen and disappointing as a physical object.
3. The compact release label
Use restrained typography for the artist name, artwork title, release year, website, or social handle. This can identify a loose sticker after packaging has disappeared, but it should not imply edition size, authenticity, or provenance unless the release actually documents those things. A factual label is more credible than decorative language designed to manufacture rarity.
4. The mini-print
Treat the liner as a tiny paper print that remains after the sticker is used. A mini-print needs a composition that works independently; simply placing the full front illustration on the back can make the result feel like a faded duplicate. A distinct crop, alternate expression, monochrome study, or secondary motif usually gives the remaining paper a clearer reason to exist.
5. The quiet back
Not every second surface needs a second performance. A small symbol, neat wordmark, or repeating pattern may be enough. This is often the strongest choice for visually dense fronts, mixed-artist packs, or designs whose appeal depends on a clean silhouette.
Printed liner, backing card, or sticker sheet?
Choose the format according to what should remain after the sticker is peeled. That decision is more useful than asking which option looks most elaborate in a product photo.
| Format | Best artistic use | What remains after peeling | Main limitation |
|---|---|---|---|
| Printed release liner | A reveal, visual echo, small label, or mini-print directly tied to one sticker | A liner shaped or sized with the sticker product | Limited area and printer-dependent setup |
| Separate backing card | A fuller illustration, story, instructions, or displayable insert | The complete card, usually without an adhesive layer | Adds packaging and can make a simple release feel overbuilt |
| Kiss-cut sheet or carrier sheet | A composition connecting several stickers with surrounding artwork | The printed sheet after individual stickers are removed | The empty spaces may look awkward unless the post-peel state is considered |
A backing card is usually the safest choice when text needs room to breathe or the secondary image deserves to survive intact. A sheet is better when several pieces form one scene, sequence, or palette. A printed liner is the compact option: it keeps the second image physically attached to the sticker until use.
Artists building a multi-design release can first settle the selection and visual rhythm using this small-run sticker pack workflow, then decide whether every design needs its own back or whether one shared treatment would make the group more coherent.
A documented artist-release example
The listing for AJ5S’s SS21 Sticker Pack describes a four-sticker Spring/Summer 2021 pack with printed sticker backs or back paper. It provides a documented, artist-controlled example of liner printing being included as part of a sticker-pack presentation. The listing does not establish why that choice was made, and it should not be used to infer current availability, rarity, edition size, or collector value. View the archived AJ5S pack listing for the release description.
The useful lesson is not to imitate that specific pack. It is that the liner can be considered alongside the sticker selection rather than added as an afterthought. The precise creative role still depends on the individual release.
Production questions to answer before designing the back
Keep the production conversation focused on the creative result. Before building finished artwork, ask whether the printer supports printing on the release liner of an individual die-cut or kiss-cut sticker. A listing for double-sided printing, sticker sheets, or backing cards may describe a different product.
- Name the surface clearly. Ask for printing on the removable release liner or backing paper.
- Confirm the physical format. Determine whether the product is an individual die-cut sticker, a kiss-cut piece on a larger carrier, or a multi-sticker sheet.
- Request the printer’s current template. Do not adapt a front-only template and guess where the rear image belongs.
- Confirm peel and viewing orientation. Ask how the back file should be rotated or mirrored so it reads correctly when the finished object is turned over.
- Keep critical text away from uncertain edges. Use the printer’s stated safe area rather than inventing a universal margin.
- Request a proof showing both surfaces. For a reveal concept, ask how the front shape corresponds to the rear artwork.
- Order a small sample or short run when alignment is central to the idea. A screen mockup cannot demonstrate every physical registration or peeling variable.
One vendor-specific example shows why that conversation matters. StickerGiant’s setup guide requests separate front and back artwork, a 1/8-inch safety inset, and mirrored rear artwork for custom shapes. Those instructions apply to its workflow and should not be treated as universal specifications. Artists using another supplier should follow that supplier’s template instead. Read StickerGiant’s backprinted-file instructions for the full context.
Once the visual idea is settled, a custom sticker printer can be a practical next stop for discussing available formats. Confirm liner backprinting explicitly before choosing a vendor or preparing final files; it is a specialized capability, not a safe assumption about every sticker product.
Design for both the unpeeled and peeled object
A liner has two states. Before peeling, it completes the sticker as a handled, traded, sold, or stored object. After peeling, it becomes a fragment with a sticker-shaped absence or an empty surface of its own. Good liner art anticipates both.
For a collector who keeps stickers unpeeled, rear artwork can make handling the object feel more deliberate. For someone who uses the sticker, the liner can leave a modest souvenir. Neither outcome automatically makes the release more valuable or collectible. It simply gives the artist another compositional decision.
Collectors who want to preserve complete objects may keep especially thoughtful liner designs in sleeves or other storage rather than peeling them. The broader principle is the same as building an artist-sticker collection intentionally: decide whether the appeal lies in the front image, the complete release presentation, or both.
Let the front stay louder
A printed liner is worthwhile when it finishes an idea that already belongs to the sticker. Start with one sentence: “After turning over or peeling this piece, the viewer discovers…” If the answer is a meaningful image, note, connection, or visual joke, the back may deserve ink. If the answer is merely another logo, a quiet mark—or no printing at all—may be the better edit.
The next step is to sketch the front, intact back, and peeled liner side by side. That three-state view will reveal whether the concept has a genuine second act or is simply asking a small piece of paper to do too much.