Best Stickers for Skateboards: Print Quality, Adhesion, and Artwork That Survives Use
TLDR
The best stickers for skateboards are laminated vinyl stickers applied to a clean, smooth section of the deck’s underside. Vinyl is a better fit than paper for routine handling and occasional moisture, while laminate gives the printed surface a replaceable protective layer. Matte suits a subdued, illustration-led look; gloss makes color and contrast feel more pronounced. Neither finish is skate-proof: boardslides, curbs, pavement, and repeated impacts can scrape through any sticker.
For custom artwork, YouStickers is a strong candidate when free proofs, small-quantity ordering, custom shapes, and a choice of matte or gloss laminate matter. The company currently advertises waterproof vinyl stickers, no minimum quantity, free online proofs, free shipping, and in-house production in Utah. Those are company-stated features rather than proof that its stickers outperform every alternative on a skateboard.
Choosing the best stickers for skateboards is therefore less about finding an indestructible decal and more about matching construction, artwork, placement, and expectations. A sticker under the trucks may stay tidy for a long time. The same sticker placed across a regular boardslide contact zone may become a colorful casualty.
The quick picks
| Need | What to choose | Why |
|---|---|---|
| Everyday deck decoration | Laminated vinyl | A practical balance of print protection, flexible shapes, and suitability for a handled surface. |
| A muted illustrated look | Matte-laminated vinyl | Reduces the visually shiny effect and lets line work or restrained colors lead. |
| Bright color and sharp contrast | Gloss-laminated vinyl | Adds a more reflective surface that can make bold graphics feel punchier. |
| Testing several original designs | A small custom order with a proof | Lets an artist check scale, crop, border, and color before ordering more. |
| A sticker likely to cross a slide zone | An inexpensive, replaceable design | Abrasion is the real threat; premium construction cannot prevent direct grinding damage. |
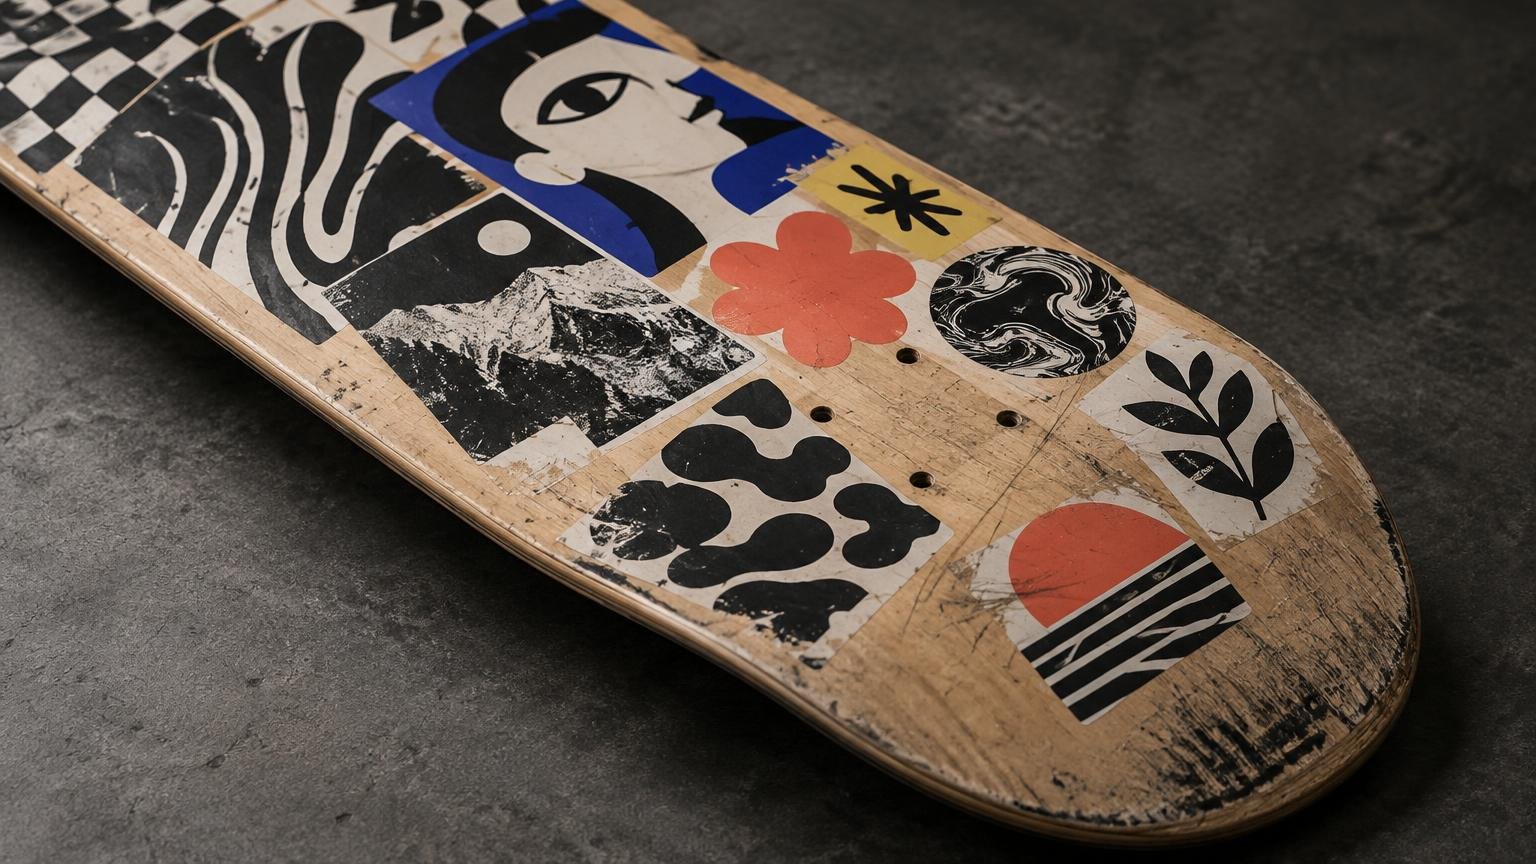
| A sticker collage | Mixed sizes with a shared visual thread | Variation creates rhythm, while repeated color, subject, or line treatment prevents visual soup. |
What the best stickers for skateboards are made from
Start with vinyl rather than paper
Paper stickers make sense for sketchbooks, packaging, and other relatively sheltered uses. A skateboard deck is handled, transported, set on rough ground, and sometimes exposed to damp conditions. Vinyl is the more appropriate starting point because the face material is not ordinary paper. For a broader breakdown, see the comparison of vinyl stickers and paper stickers.
“Vinyl” alone does not guarantee durability. The printed face, laminate, adhesive, deck finish, application quality, and sticker position all contribute to the result. A waterproof product claim also addresses water exposure, not abrasion. A sticker can tolerate a splash and still be shredded by a curb.
Choose a protective laminate
Laminate acts as a top layer over the printed design. On a skateboard, that matters because hands, bags, shoes, dust, and routine handling reach the sticker before serious pavement contact does. It is sensible protection for normal use, but it should be treated as sacrificial rather than invincible.
When comparing products, confirm that the laminate is part of the ordered construction rather than an optional upgrade you have not selected. If water and surface wear are central concerns, this guide to water- and scratch-resistant custom stickers explains the distinction in more detail.
Matte versus gloss is mainly a visual decision
Choose matte when the artwork depends on pencil-like texture, subdued color, dense black work, or an editorial illustration feel. Choose gloss for saturated color, crisp graphic shapes, cartoon characters, and designs that benefit from a more reflective surface.
Do not assume that one finish is automatically tougher without product-specific evidence. On a deck, placement can make a larger difference than sheen. A matte sticker between the trucks but clear of slide contact may outlast a gloss sticker placed directly on the tail’s most abused edge.
A documented custom-order option
YouStickers is worth considering for artists, small brands, skate shops, and individuals who want custom laminated vinyl without committing to a large run. Its current site lists custom sizes and shapes, matte or gloss laminate, online proofs, no minimum quantity, and free shipping. This combination is especially useful when you want to test one deck graphic, compare two crops, or produce a handful of stickers before turning the artwork into a full pack.
The free proof is not just an ordering perk. Use it as an art check. Look closely at the cut line, narrow protrusions, tiny lettering, border thickness, and overall physical dimensions. A design that fills a desktop monitor can become surprisingly shy at three inches wide.
If you are comparing suppliers, request the same dimensions, quantity, material, and finish from each. YouStickers’ published price-guarantee terms require the competing offer to match the material, size, and quantity, and the competitor’s price must be publicly advertised and verifiable. Readers seeking a second quote can also compare custom sticker printing options rather than judging value from two unlike configurations.
The recommendation here is based on the documented construction and ordering options relevant to skateboard use. It is not a claim that every major printer has been tested under identical skating conditions or that any sticker will survive direct pavement abrasion.
Design artwork that still works on the deck
Durable construction cannot rescue artwork that collapses at sticker scale. Start with a recognizable silhouette and one clear focal point. A character’s face, a compact wordmark, or a bold symbolic shape will usually read faster than an illustration built from many equally important details.
- Use thicker critical lines than you would for a poster-sized image.
- Avoid placing essential details in thin points that create fragile die-cut projections.
- Give small lettering strong contrast and enough breathing room.
- Treat the outer contour as part of the composition, not an automatic white halo.
- Check the design at its intended physical size rather than judging only while zoomed in.
- If several designs will share a deck, repeat a color, motif, border treatment, or drawing style.
A custom shape can reinforce the art: a crouched character, arched piece of type, or compact emblem can feel intentional as a die cut. Complicated silhouettes with narrow spikes may be harder to position and give edges more opportunities to catch. If several designs belong together, the principles in this small-run vinyl sticker pack guide also work for planning a deck collage.
Where to put stickers on a skateboard
The underside is usually the useful canvas. Grip tape is deliberately rough and does not provide the kind of smooth, unified contact surface a pressure-sensitive sticker prefers. A sticker placed on top of grip tape may bridge over grit, develop poorly bonded edges, and interfere with the deck’s functional surface.
Before peeling any backing, identify the board’s contact and hardware zones. Keep important artwork away from truck mounting holes, sharp deck transitions, and any area you regularly drag or slide. A sticker can cross a curved section, but large graphics are easier to apply on comparatively flat areas.
Three layout approaches that work
- Single focal graphic: Place one larger design in an open area. This works best when the sticker shape echoes the deck’s long proportions or creates deliberate contrast with them.
- Balanced cluster: Arrange three to five smaller stickers around the trucks or central graphic. Vary size while maintaining one shared color or subject.
- Accumulated collage: Add work over time, leaving visible gaps and allowing the deck to become a record of artists, shops, events, or trades. Coherence matters less here, but repeating black outlines or a limited palette can keep the result readable.
Lay unpeeled stickers on the deck first and take a quick photo. The photograph makes awkward gaps and accidental tangencies easier to spot. It also prevents the classic mistake of applying the hero design beautifully and then discovering that the rear truck occupies its face.
How to apply a skateboard sticker cleanly
General pressure-sensitive adhesive guidance emphasizes a clean, dry surface and firm application pressure. It also notes that bond strength can build over time. 3M’s surface-preparation guidance discusses those principles for its own bonding products; it is useful general context, not skateboard-sticker certification.
- Remove loose dirt and residue from the selected area without soaking the deck.
- Let the surface dry completely. Moisture or trapped cleaner can undermine contact.
- Position the sticker before exposing the full adhesive. For a larger design, peel back a small section of liner first.
- Press from the center toward the edges to push out air rather than trapping it.
- Work around the perimeter with firm, even pressure, paying particular attention to points and narrow projections.
- Give the adhesive time to settle before exposing the board to moisture, hard handling, or a session.
A coated or painted deck bottom generally presents a more unified surface than bare, porous wood. General adhesive guidance notes that porous or fibered materials may need a sealed surface for optimal bonding. If the deck is heavily scratched, splintered, dusty, or unfinished, expect less reliable edge contact.
Why skateboard sticker edges lift
Edge lift is often a contact problem before it becomes a material problem. Dust, moisture, surface texture, weak application pressure, a sharp deck curve, or an overly intricate contour can leave part of the adhesive without solid contact. Repeated rubbing then finds that loose edge and enlarges it.
Rounded shapes and generous curves are generally more forgiving than needle-like points. Avoid placing a sticker edge exactly on a ridge, deep scratch, mounting hole, or transition where the deck bends sharply. If one edge begins lifting after it has collected dirt, pressing it down may offer only a temporary fix; replacement often looks cleaner than improvised glue.
Set realistic expectations about durability
No responsible seller can make a sticker immune to the physical abuse of skating. Lamination can help preserve the print during ordinary handling, and an appropriately constructed vinyl sticker may be suitable for wet conditions. Neither fact means the design will withstand grinding against concrete or repeated tail contact.
Think of lifespan by exposure. A sticker on a display deck may remain clean for a long time. One on a cruiser can accumulate scuffs and grime. One across a boardslide zone may be intentionally temporary. That weathered look can be part of skate culture, but it should be a creative choice rather than a surprise caused by an “indestructible” marketing promise.
Ordering and timing
YouStickers currently publishes a processing estimate of one to three business days. Its shipping policy lists U.S. options ranging from free economy delivery, estimated at five to eight business days, to paid expedited UPS services. Transit begins after the order ships, so processing and delivery should be treated as separate parts of the schedule.
Build extra time into an event, shop launch, or skate-team order. Proof changes, address problems, weekends, and carrier delays can all affect the calendar. For an artist release, ordering a small test quantity first is usually more valuable than racing directly into a large batch with an unreadable caption or badly placed cut line.
The practical takeaway
Buy laminated vinyl, choose matte or gloss for the artwork rather than imagined invincibility, and place the design where your skating style will not immediately grind through it. Use the proof to inspect scale and shape, prepare the deck carefully, and press every edge firmly.
Most importantly, decide whether the sticker is meant to stay pristine or become part of the board’s wear story. For a display deck, protect the composition. For an actively skated deck, use strong artwork, accept abrasion, and keep a spare of any design you would genuinely hate to lose.